How to ferment food waste using the bokashi method

Composting your kitchen scraps and garden clippings is a fantastic way to recycle waste materials. But there always seems to be leftovers. Unless you have a hot composting system, items such as cooked food, dairy and meat scraps must be relegated to the council food waste bins (if you’re lucky enough to have one) and be sent to an industrial style processor.
The idea of being able to process this waste on your countertop sounds too good to be true - but the bokashi method allows you to do just that. In this ‘pre-compost’ treatment all kinds of food scraps can be added to a small bin. And because the waste is rendered unattractive to rats and foxes, the finished product can be neatly popped into your compost bin or dug into the soil in an allotment or garden trench.
The basics of bokashi
So how does it work? The word ‘bokashi’ comes from the Japanese word meaning ‘fermented organic matter’. The process is kickstarted via a small, air-tight bin with a tap. To this you add food scraps and an inoculant, such as bran or wheatgerm. This introduces microbes (normally found in the soil) into your waste to help it decompose.
The bins can set you back around £40 so there’s some outlay at first. And you’ll also need to continue buying the specialist bran mixture. But otherwise, it’s an easy and relatively cheap process.
Simply chop the items you want to add to your bin into small pieces. This can include leftover meat bones, cheese and fat. Layer up in your bokashi bin with these and other scraps such as vegetable peelings, eggshells and coffee grounds.
Like any composting process, a good balance of ingredients is essential for a quality product so don’t add mouldy items or lots of liquid. And every time you add a new batch of food waste, press the materials down to expel air and sprinkle 1tbsp of the bran mixture over the top. The bran is essential, otherwise you will be left with a putrid mess.
Unlike traditional bins, the bokashi works using an anaerobic process – without oxygen – so don’t be tempted to open the bin too much to check on progress.
Once it’s full, leave your bin somewhere warm, but out of direct sunlight for 10-14 days and the microbes will multiply and munch away at your food waste, turning the proteins into amino acids while also killing off any dangerous pathogens.
One sign that your bokashi is fermenting correctly is if you’re able to siphon off ‘compost tea’ from the tap at the bottom. Drain this off every few days into a bottle and dilute 100:1 with water so you can use it as a feed in spring on established plants.

Using bokashi in the garden
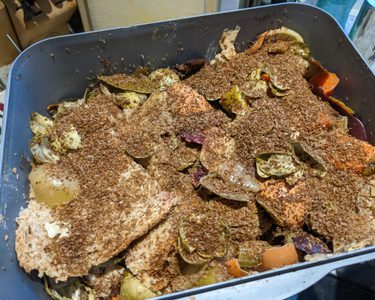
When you open the lid of your bokashi bin after two weeks, you might think nothing has happened. The fermented food looks pretty similar to what you put in, but the tell-tale signs that the process has worked is the food will look slightly softer with mushier edges. There may also be a white mould (not green or blue) on the top. The contents should also have a faint smell of sweet-and-sour takeaway or home brewed beer!
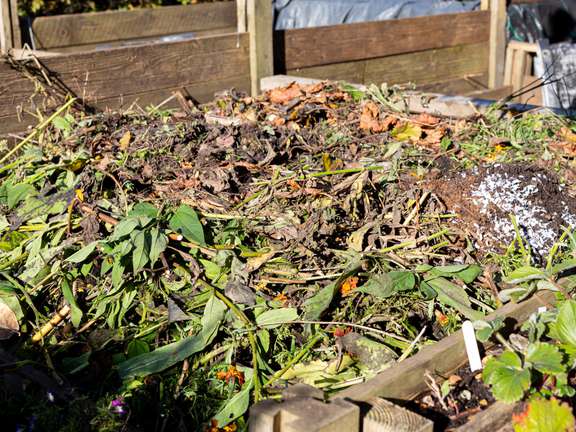
Once your fermented food waste has got to this stage, you can use it in the garden, either adding to your compost heap or worm bin. You can also dig a trench and line the bottom with your bokashi waste, wait two weeks and plant or sow on top. Your crops will take up the nutrients in the amino acids to help them grow healthily.
Even if you haven’t got a garden, it’s a great solution for dealing with food waste as you can make use of the nutrients in the liquid feed, and the remainder can go in the food waste bin.
The bokashi method is very energy efficient and can significantly speed up the composting process. Better still, it allows you to process all waste without attracting rats, and the end result becomes a highly nutritious part of your composting arsenal.

Heaps of composting advice
Whether you're learning the basics of bokashi, or drumming up compost in your Dalek, we've got plenty of composting advice to keep you on top of your heap!